


The Ultimate Website Quality-Assurance Checklist
A Website, like a plane, needs to comply with a standard QA list. Here is what a practical QA list should include to save you from a crash landing.
Imagine boarding a plane for a long flight. You’re buckled in and snacking on complimentary peanuts as the pilot announces,
Good evening, ladies and gentlemen; we are now ready for takeoff. We missed our safety checks, my co-pilot is out sick, and I have no idea if we have enough fuel to reach our destination, but the crew and I are going to wing it. Sit back, relax, and enjoy your flight.
Not the most reassuring announcement, is it?
Laugh all you want about that unlikely scenario, but it is not entirely different from any web or app developer who launches a new website without considering all the important and minor details that can make a launch a huge success or a whopping failure.
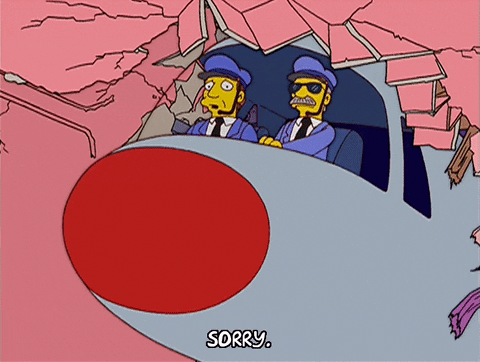
A website, like a plane, should comply with a standard quality-assurance list.
" A website, like a plane, should comply with a standard quality-assurance list. "
A quality-assurance list is an orderly checklist you can follow to ensure that your website launch is of high caliber from start to finish.
We’ll show you what a practical, easy-to-manage QA list should include (and give you a FREE QA list template) to save you from a crash landing.
Make a List and Check it Twice
Making a QA list is integral to your website launch, not a side note or an afterthought.
As boring as it sounds to make a meticulous list, you’ll see how it will help you avoid stressful emergencies, unnecessary troubleshooting, and wasted time.
That is why the most experienced web developers leave nothing to chance, but take pre-emptive measures to prevent the worst coming to worst.
" QA lists are not about what could go wrong; they’re about preventing what could go wrong. "

Some might think, “If you need a list of all the things that might go wrong, you’re not ready to launch,” but QA lists are not about what could go wrong; they’re about preventing what could go wrong. They are what confident and wise developers create because, no matter how much hard work is put into a flawless launch, humans are humans, and humans make mistakes.
Part of being a reliable and professional agency is admitting that no one is perfect and that precautions are needed in every area. Then, your client can be assured you have taken all possible measures to protect their precious baby.
Let’s start by breaking down what comprises a helpful QA list.
- Pre-Launch: before you go live.
- Launch: when you go live.
- Post-Launch: after you go live.
Each category should be customized for each stage of the launch.
" Each category should be customized for each stage of the launch. "
For example, Stage 1, Pre-Launch, should consist of all the big and small assignments to create the body of your website before launching, such as:
- content—migrate all content to the new website;
- meta-data—go through all pages and make sure they have meta-titles, descriptions, and the desired opening graphic (“OG”) image; and
- H1s—go through all pages and make sure they have the desired H1s.

Stage 2, Launch, should consist of tasks that require your immediate attention on the day, to ensure that all assets are functioning properly and the public can view everything correctly. For example:
- Set TTLs on the domain DNS to something low;
- update development-environment variable values with production values;
- change DNS records to point to the new site and move the old site to a sub-domain for backup; and
- double-check environment variables after the DNS change.

Stage 3, Post-Launch, is the immediate checks and ongoing maintenance and care you provide following the launch. It’s not enough to launch and expect that problems will never arise. Be responsible and attentive. For example:
- post-launch SEO site audit—trigger Ahrefs or SEMrush bot to scan any broken pages, URLs, or potential indexing issues;
- Webmaster Tools—refresh site map, and
- update CMS preview settings to live URLs.

At WITH LOVE INTERNET, before we launch, we have a meeting with our clients and make sure that each QA list item is attached to a person responsible for completing that task.
The efforts of both our team and our client’s team make a winning combination. Our agency typically handles only technical implementations and configuration changes, while our clients focus on content tasks such as metadata and OG images.
" The efforts of both our team and our client’s team make a winning combination "
Pro Tip: Color-coding is helpful for on-the-go status updates and designating assignments to specific team members. We recommend color-coding the status of your assignments as follows:
- Pending;
- In Progress;
- Ready for Review; and
- Approved.
The examples given above are only a handful of the critical assignments you need on a QA list.
For a FREE QA list template, CLICK HERE.
Avoiding Turbulence—The Practical Way
Creating a website QA list is not only about a smooth launch. Not doing so could also harm your client’s SEO score, which would cause Google to rank their website lower. The last thing you want in such a critical moment is to receive less traffic. Houston, we have a problem!

Here are four practical tips on how to avoid the pitfalls of a failed launch:
1. Team Work—delegate different assignments to different team members according to their specialties. You are guaranteed failure if you drop all the responsibility on one team member’s capable, but limited, shoulders. Instead, agree in advance on who is responsible for which assignment, and make sure each is comfortable in their role. It’s crucial that the testing of a task should not be done by the same team member who created it. Always have a different set of eyes, making sure that the task was completed properly. For example, assign one team member to ensure that all the redirects are adequately mapped out in advance. Next, assign another team member to make sure all pages have a proper title, meta-description, and OG image. Assign your developer to be responsible for making sure the website speed is optimized, and so on and so forth.
" You are guaranteed failure if you drop all the responsibility on one team member’s capable, but limited, shoulders. "
2. Eliminate forgetfulness—share your QA list with your team as far in advance as you can. The more eyes you have on board, the better—it gives you a better chance of making sure nothing falls through the cracks. The process of launching a website is meticulously detailed and overwhelming. Each step, if not correct, can cause a disastrous domino effect. Creating a list will eliminate the possibility of forgetting those essential tasks, which will make your workflow as smooth as possible.
" Creating a list will eliminate the possibility of forgetting those essential tasks. "
3. Schedule a date—clear your schedule as much as possible so your focus and attention are not demanded elsewhere. We recommend communicating at least two weeks in advance and dedicating a day to your launch. Ensure your environment is conducive to a successful launch, with a speedy Wi-Fi connection and few distractions or interruptions.
" We recommend communicating at least two weeks in advance and dedicating a day to your launch. "
4. Partner for success—communicate with clients and any other agencies well in advance about the launch process and what might be required of each party. Usually, the agency is responsible for optimization and development, and the client is responsible for the content of the website. Lastly, keep everyone updated on the launch’s progress in real-time, and don’t forget to keep a calm and positive attitude.
" Communicate with clients and any other agencies well in advance about the launch process and what might be required of each party. "
Launch Away
It’s never a good idea to leave things till the last minute, and a QA list exists to ensure you’re blindsided by anything. Please excuse the mixed metaphor, but if you end up running around like a headless chicken, trying to patch the holes in a sinking launch, you know you’ve done too little too late.

We strive for excellence and still understand that a website will never be 100% perfect at launch and is always a work in progress. There will always be improvements and corrections to make following a website launch, like content changes, visual updates, and some bugs that weren’t caught during QA. So be careful not to fall on the slippery slope of a perfectionist mindset.
" So be careful not to fall on the slippery slope of a perfectionist mindset. "
Our FREE QA list template can be customized to fill your specific launch requirements: CLICK HERE.
If you need more information on how to nail your first launch, our digital marketing experts and web developers have your back. Contact us today to schedule an appointment for a consultation.